Our site www.viart.com site is operated by latest Viart Shop 5 with default Clear design
ViArt User's Guide (Version 4,5)
This section describes how to setup PayPal Website Payments Standard for your ViArt shopping cart. Please, carefully follow all the instructions below.
This section describes how to setup PayPal Website Payments Pro for your ViArt shopping cart. Please, carefully follow all the instructions below.
8.2. Blocks and Frames settings
Prev Index Next

Overview

In version 4.0 instead of columns appeared a new unit of measure - frames. Frame means a grouping of blocks. For example, in 'Three Columns' layout there are 5 frames: Header, Left Column, Middle Column, Right Column, Footer.

Frame Settings

To specify frame's settings click on the 'Tools' icon next to it.

Next you will see a pop-up window with the following settings:

  • Frame Style - this field is used to set up style settings per frame, you can put there styles like width, background-color, display, border-style etc.
  • HTML Frame Start - a code from this field will be put at the beginning of the frame.
  • HTML Before Block - a code from this field will be put before each block in the frame.
  • HTML After Block - a code from this field will be put after each block in the frame.
  • HTML Between Blocks - a code from this field will be put between each block within the frame.
  • HTML Frame End - a code from this field will be put at the very end of the frame.

Note: to apply HTML code to the whole frame you should put opening tags in HTML Frame Start and closing tags in HTML Frame End.
To apply HTML code to the whole block use HTML Before Block for opening tags and HTML After Block for closing tags.

Example #1: Setting up columns width

In version 4 columns width can be changed with the help of Frame Style field, for example:

width: 500px;
or
width: 30%;

Click 'Update' and then 'Save' to keep the changes. Remember to set the width for each column, for example in 'Three Columns' layout you should specify width for Left, Middle and Right columns, in 'Hot' layout - for Hot, Left, Middle and Right columns.

Note: in Hot Layout width should be calculated like this:
  • 'Hot' frame and 'Right Column' frame = 100% (for example 'Hot' = 80% and 'Right Column' = 20%)
  • 'Left Column' and 'Middle Column' = 100% = 'Hot' frame (for example, 'Left Column'=25% and 'Middle Column'=75%)

Example #2: Adding border to the frame

In case you want to underline a central frame you can go to CMS > Pages Layouts > click on the page you would like to change and then click on the Frame settings icon of the Middle Column. Next specify in the Frame Style field an appropriate CSS style, for example:

width: 50%;
border-color: #32CD32;
border-width: 8px;
border-style: ridge;

Click Save and Update and then check your site.

Example #3: Adding payment and delivery logos into the frame

One of the ways to display different logos on your site is using frame settings. For example, let's add payment systems and shipping services logos on the basket page like on the screenshot below.

Go to CMS > Pages Layouts > Basket and click on the 'Middle Column' frame settings. In 'HTML Frame Start' field add a simple table with payment systems images e.g.


<table width=100%>
<tr>		<td colspan="5"><b>Payment Processors</b></td>
	</tr>
	<tr>
		<td><img src="images/partners/paypal.png" alt="PayPal"></a></td>
		<td><img src="images/partners/CheckSavers.png" alt="CheckSavers"></a></td>
<td><img src="images/partners/sage-pay-logo.jpg" alt="SagePay"></a></td>
		<td><img src="images/partners/easypay.png" alt="EasyPay"></a></td>
		<td><img src="images/partners/ultimatepay.png" alt="UltimatePay"></a></td>
	</tr>
</table>

And in the 'HTML Frame End' specify the postal services logos:


<table width=100%>
	<tr>
		<td colspan="5"><b>Postal Services</b></td>
	</tr>
	<tr>
		<td><img src="images/partners/pps-fedex.gif" width="111" height="33" alt="FedEx"></a></td>
		<td><img src="images/partners/pps-usps.gif" width="159" height="29" alt="USPS"></a></td>
				<td><img src="images/partners/pps-ups.gif" width="50" height="59" alt="UPS"></a></td>
		<td><img src="images/partners/pps-canadapost.gif" width="144" height="34" alt="CanadaPost"></a></td>
		<td><center><img src="images/partners/Auspost.gif" alt="AusPost"></a></center></td>	
	</tr>
</table>

Make sure your settings look like below.

And the last step - click on Update button to save the frame settings and Save to save the page layout settings.

Block Settings

To specify blocks settings go to CMS tab > select the page you would like to edit and click on the 'Tools' icon next to the block. You will see a pop-up window with the following settings:

  • Tag Name: used for building in blocks. For more information please see section 8.5.
  • HTML Template: you can specify here your own template.
  • Block CSS Class: used to assign a different CSS class to a block. Specify here only the name of the class without any dots or additional elements, e.g. myClass, blockYellow, curved etc.
  • Block Style: if block does not have a style yet, you can use this field to specify your own style elements, e.g. border: 1px solid black; width: 100px;. (More about the difference between Block Class and Block Style below).
  • Block Title: used to give a different name to a block, for example Computers Catalog, My Shopping Bag etc. Note you can use HTML and language tags in this field as well.

What is the difference between 'Block Style' and 'Block CSS Class''?

You can use Block Style only on the occasion when the style is not defined for a block yet. For example, if there is no definition of the 'margin' in your design styles then you can enter in the Block Style field the following:

margin-top: 15px;
margin-left:35px;
margin-right:35px;
margin-bottom:30px;

And these styles will apply to the block like below:

Example #4: Changing background of the block

But if you wish to change background a style like "background-color: yellow;" wouldn't work because background is most likely has already been defined in another CSS class, for example Special Offer block in Double design uses a .BlockMiddle class:
.BlockMiddle {background: #EDEDED url(../images/double/grey_CR.gif) repeat-y right; position: relative;}

As you can see from the code above specifying the background colour, image URL or position in the Block Style field for Special Offer block is not going to work. That's why in this case we need to create a new style in CSS file to overrirde its current settings, for example:
.blockYellow .BlockMiddle {background-color: yellow;}

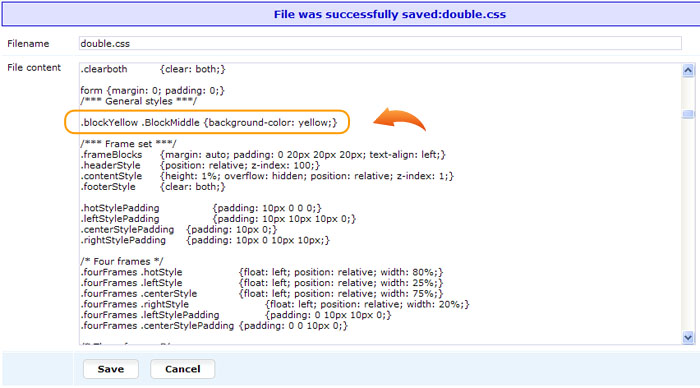
NOTE: the first word should be the name of your new style and the second word is the name of the style or property you want to override.

Next you need to specify the name of a new class in the field Block CSS Class. Remember you should specify only the class name, without any dots or other style elements, please look at the screenshot below for example:

After clicking Update and Save, check your site where the background colour should be applied.

Example #5: Change text font and size in a block

Usually to change font in some block you need to find out what styles it uses and create a new CSS class that would override it. That's why we recommend to use the steps described below.

  • Step 1. Inspect the block you would like to change using your browser developer tools. For example, in Google Chrome, Internet Explorer and Opera such tools are built-in and in Firefox you need to download an add-on called Firebug. Such tools allow to select an element and see the styles it uses. For example, to change the Categories List font highlight the category name and check what styles are applied to it. On the screenshot below we can see it uses a .title class.

  • Block 'Categories List' has top and subcategory levels with active and inactive styles so check these styles as well.

  • Step 2. Using information from Step 1 create the styles below and add them to your CSS file:

    .myCatsFont .title {font: 17px Trebuchet MS; color: #B00000;}
    .myCatsFont li.subCategory .title {font: 14px Trebuchet MS;color: #D00000;}
    .myCatsFont .selectedtopCategory .title {font: 20px Trebuchet MS; font-weight: bold; color: #B00000;}
    .myCatsFont .selectedsubCategory .title {font: 16px Trebuchet MS; font-weight: bold; color: #B00000;}

  • Next you just need to go to CMS > Pages Layouts > Products Listing Page > "Products > Categories List" settings > in Block CSS Class enter myCatsFont.

    If you need to change the font of this block everywhere on the site (i.e. on all pages, index.php, products details, custom pages etc.) then look into this block's template, for example in our case it is 'block_categories_list.html' where on the first line find the default class applied to this block - block-categories-list:

    So we need to create a class with block-categories-list name in CSS file and it will apply it to all Categories List blocks in ViArt Shop.

    Example #6: Use block styles from different CSS

    Below you can see an example of the Curved block styles in the Double design.

    How to achieve this?

    • Open the 'curved.css' or any other colour scheme of this design and copy to some text editor all the styles from the section /*** Structure of Block ***/.

    • Add to all copied styles a new class name, for example .curved so it will look like below:
      .curved .BlockTop {background: #6699FF; position: relative; width: 100%;}
      .curved .TopCenter {background: none; position: relative;}
      ...
      
    • For this example we will also need to add two more styles to fix the background, add them somewhere at the beginning of the curved styles:
      .curved .TopLeftBgr {background: none; position: static;}
      .curved .TopRightBgr {background: none; height: 100%; overflow: visible; position: static;}
      And specify background: none for two more styles.

    • Next copy the curved styles to your active CSS file.

    • Go to the CMS > Pages Layouts > click on the block settings and specify in Block CSS Class the new class we created - curved.

    You can do the same procedure with other ViArt Shop designs, for example convex.css requires minimum changes as well.

Prev Index Next