One Page Checkout
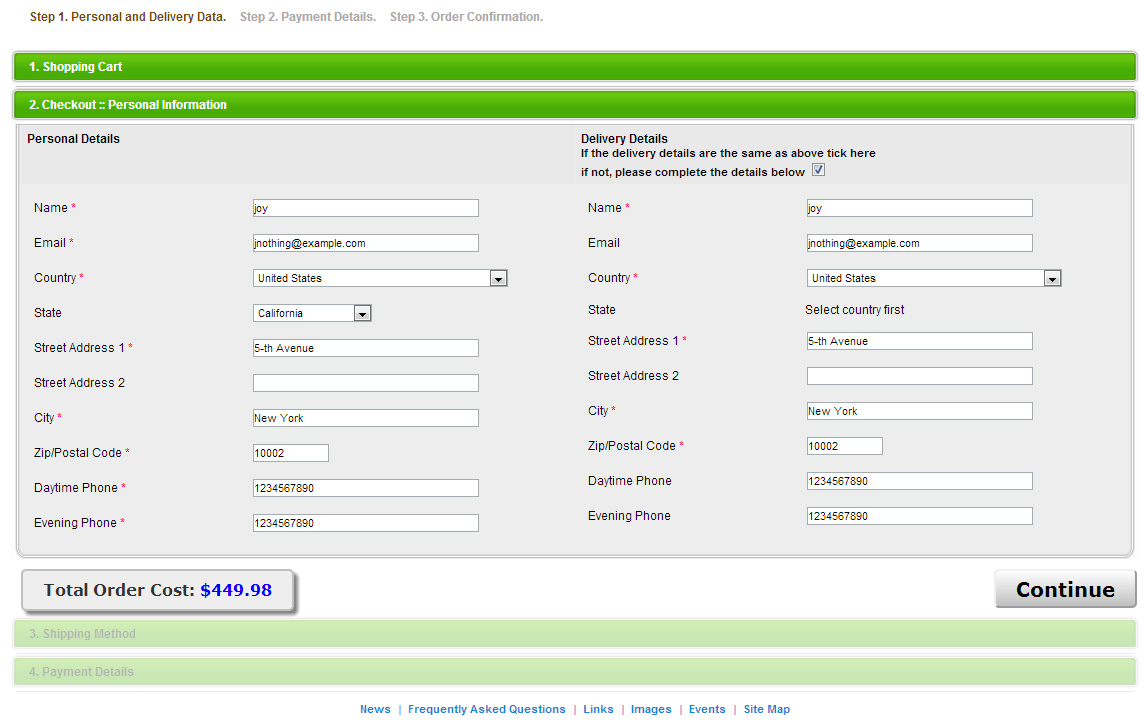
One Page Checkout is a new simple way to pay for orders. Instead of tiring page to page process now your customers can fill in all necessary information on the same page in four easy steps.

Below each step there is a dynamic Total Order Cost box that changes depending on what is selected, for example when tax is applied to some country, when shipping method is chosen or when a fee is applied for using some payment gateway. Customer can always return to the previous step by clicking on the step title.
Settings: One Page Checkout is activated by default. The main page layout (order_info.php) is available in CMS > Pages Layouts > Checkout :: Main. Other pages like Checkout :: Login, Checkout :: Confirmation , Final Checkout Page have remained without changes.
UTF-8 charset
Starting from v.4.2 ViArt Shop is moving to UTF-8 encoding. UTF-8 is a variable-width encoding that can represent every character in the Unicode character set. UTF-8 has become the dominant character encoding for the World Wide Web, accounting for more than half of all Web pages. It is not only convenient for working with special characters but it is a requirement for modern PHP versions and many software applications.
Important!
After upgrade to v.4.2 your site must switch to UTF-8 (if it is not already). It happens in two steps:
- Perform usual upgrade procedure (UTF-8 message files will be applied).
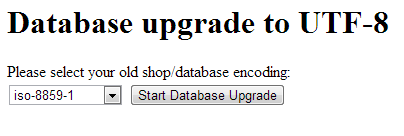
- Run in the browser the following script http://www.yoursite.com/db_utf8.php and select the database charset you're switching from.
If you notice any issues with site content after upgrade please contact our support team.
Multiple Image Upload
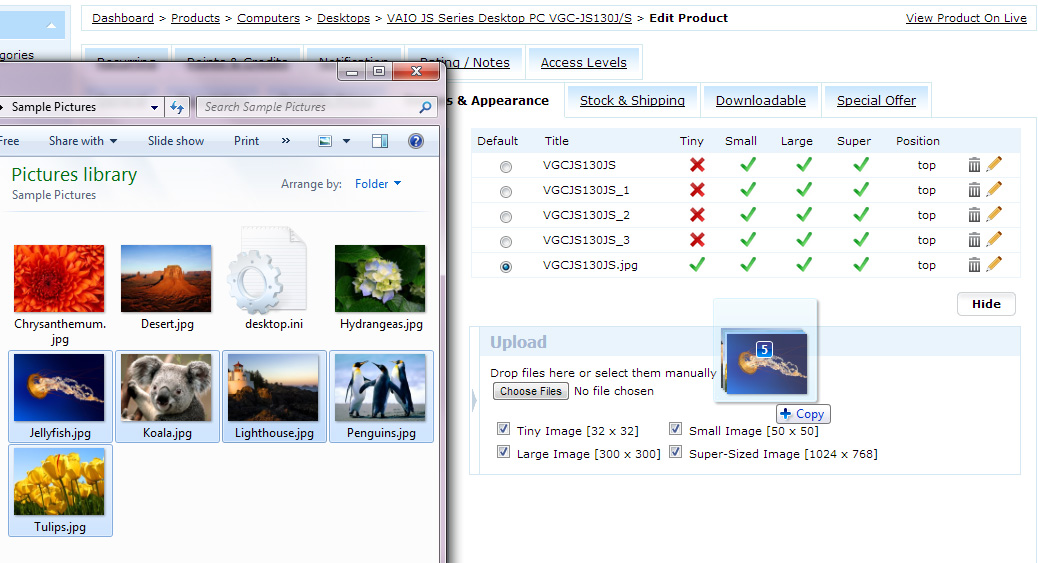
Images & Appearance tab on Edit Product page has a new user-friendly interface. Now with the help of ajax technology you can upload and resize multiple product images at the same time.
Settings:
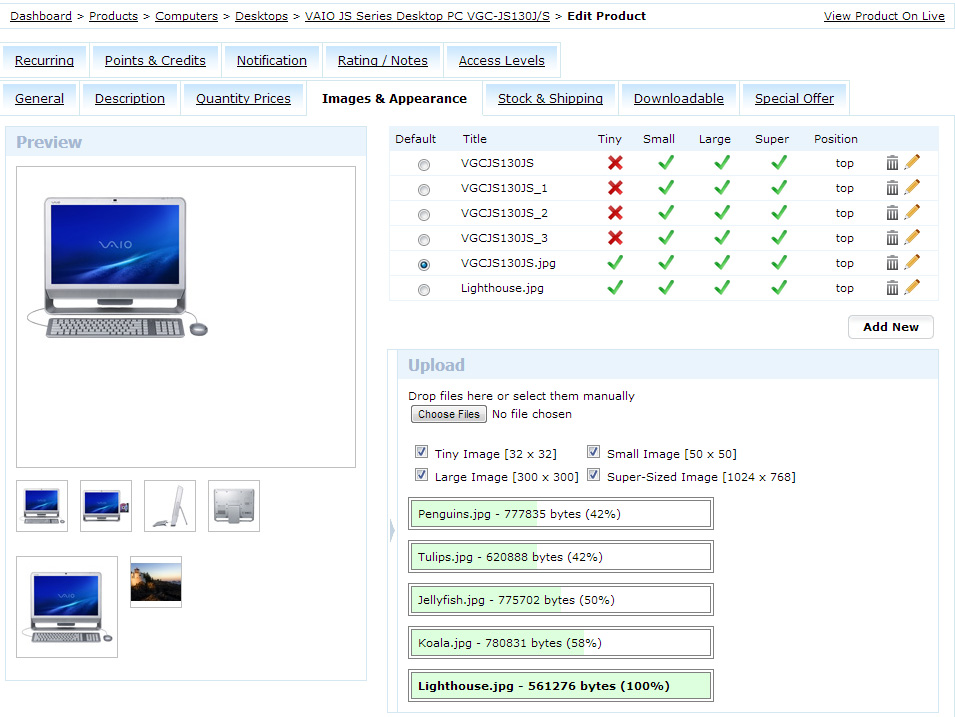
- Open Edit Product page and browse to Images & Appearance tab
- Click on Add New Image button or the restangular bar with the arrow.
- In the sliding bar specify image size if needed and either drag and drop files or click "Choose Files"
- When multiple image upload is started you will see the progress bar.
- To edit an image, for example to specify Alt tag or change sorting order, click on the pencil icon in the images list.
One more image related option is Images Type: "Keep canvas ratio" or "Fit on canvas using background color". This option is selected in Settings > Products > Products Settings > "Images" tab. 'Keep canvas ratio' means keep default proportions and 'Fit on Canvas' - make all images the same size by filling empty space with background colour.
XML import
A new format of imported files is now supported. XML is often used for inventory tracking and could have complicated nested structure. We took care of this peculiarity and prepared a universal way to import such data.
Settings:
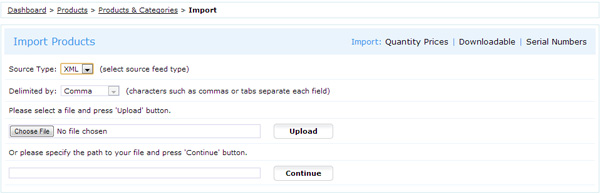
- On Dashboard > Products > Products & Categories at the bottom of the list click Import Products and select XML type in the drop down menu. Then select and upload XML file or specify the path to it on your server.
- System will analyze the nested data structure inside the file and offer to select various levels of data in the drop-down menu Select XML element with Import Data. For example, if the file has such structure:
<shop>
<products>
<product>...</product>
<product>...</product>
</products>
<orders>
<order>...</order>
<order>...</order>
</orders>
</shop>
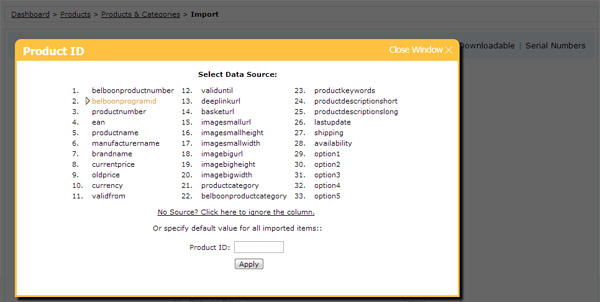
XML element with product information will be "shop > products > product". - Next select data source for each ViArt Shop database column. To do it click on the greyed out field and select the name of the field in XML file.
- If along with import you want to write default data for imported products use the control field under message Or specify default value for all imported items. For example you can set all products not available for sales or default stock level or default category etc.
- After you're finished selecting data click Import button.
Be aware! Now there is no preview page and all data is imported immediately.
Coupons with Affiliate Characteristics
If you're interested in rewarding selected promoters of your product when their efforts result in sales the new Coupons functionality is for you. Promoters or affiliates can spread the word about your product using their affiliate code which customers can use as a discount coupon code on checkout. System records usage of affiliate coupons and calculates commissions to the owner of the code.
Settings:
- There must be some affiliates in the system with their unique affiliate codes and commission settings. See this manual for more information http://www.viart.com/configuring_affiliate_module.html
- Create an Order or Product Coupon in Dashboard > Products > Coupons where in Friends & Affiliates tab select "Apply discount to the invited party" and specify what affiliates can use their code as a discount and therefore receive rewards.
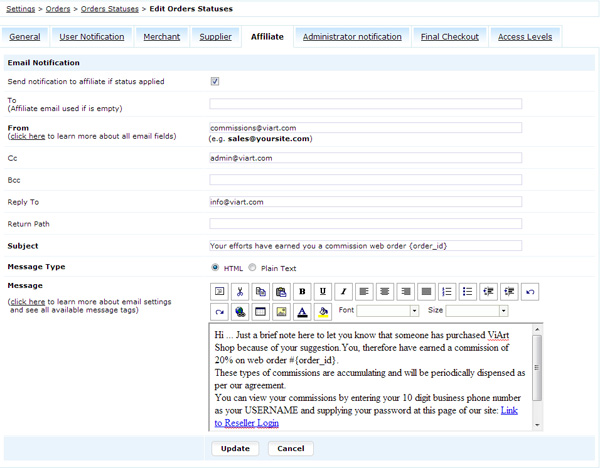
- Activate an email notification for Affiilaites on succesful purchase in Settings > Orders > Orders Statuses > Edit Status > "Affiliate" tab. Note, you can use the following tags:
{affiliate_email} Email
{affiliate_name} Name
{affiliate_items} Affiliate products - Add block Products > Friend / Affiliate Form on basket page in CMS > Pages Layouts.
- Make a test purchase using affilaite code in the "Friend / Affiliate Form" or by specifying affiliate code in the URL (coupon will be applied automatically) e.g. http://www.site.com/?af=affiliate_code
As a result customer will buy a product with a discount specified in the coupon settings and affiliate will receive a commision.

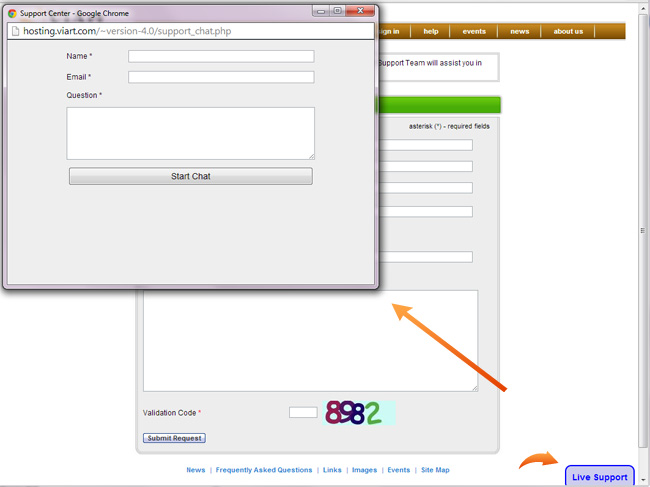
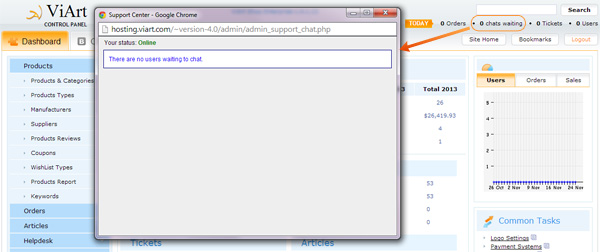
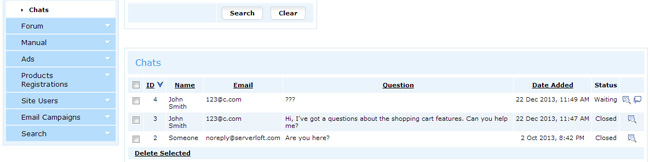
Chat
From now on ViArt Helpdesk has its own Chat module.
Settings:
- Add Online Chat block on Support page in CMS > Pages Layouts > Helpdesk > New Ticket Page.
- In admin panel click on the Waiting Chats link in the header.
- When administrator opens Chats page system sets Chat block as online and shows Start Chatting button for customers. When Chats page is closed Chat is offline.
- Chats history is kept in Dashboard > Helpdesk > Chats.
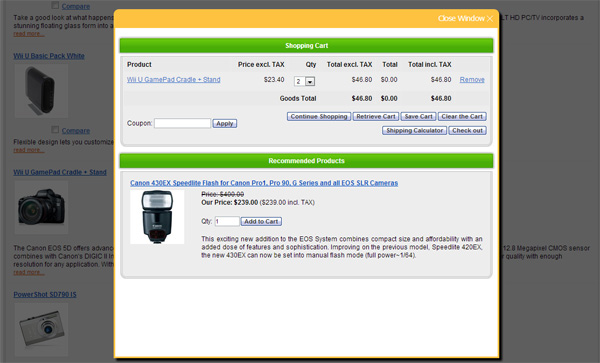
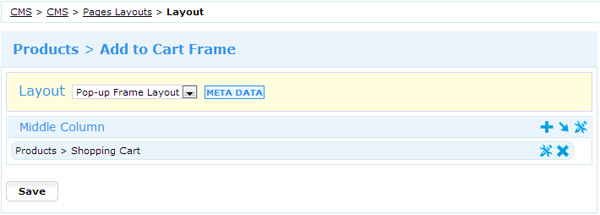
Add to Cart Frame
After adding a product to cart there is a new possibility to show a pop-up screen with basket details, recommended products or other information. The new pop-up page is triggered on Add to Cart action and can be configured in CMS.
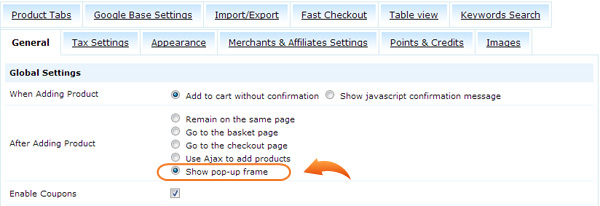
Settings:
- Select Show pop-up frame for 'After Adding Product' action in Settings > Products > Products Settings.
- Configure the page Add to Cart Frame in CMS > CMS > Pages Layouts. By default there is selected Shopping Cart block but it is possible to use 'Shopping Cart: Recommended Products' and any text blocks.
Helpdesk Replies
For those who don't have a possibility to reply on Helpdesk tickets in admin panel, for example when travelling, there is a new functionality that allows to reply directly from email client and still track replies history in Helpdesk.
Note: A pre-requisite for this functionality is setup piping on the hosting. See more info at piping preface manual.
Settings
- Activate Send Notification to Administrator in Settings > Helpdesk > HelpDesk Settings > "Notification Email" tab.
- Keep default text in the message box and click 'Save'

How it works
In every notification message to admiistrator there is added a special text in the footer:
-----------------------------Ticket-Body-End---------------------------------------
{site_url}admin/admin_support_reply.php?support_id={support_id}
Ticket ID is {support_id}
VC: {vc}
With its help whenever you receive administrator notification and hit 'Reply' the message is recorded in Helpdesk ticket under specified Ticket ID and from there delivered to the customer.
Notes
- Text below -Ticket-Body-End- including this title itself is truncated when sending to customer.
- Administrators do not receive their own replies as notifications if their email address (in Administrator profile) matches the email in Administrator Notification settings.
- VC is an encrypted parameter for secure correspondence. It is possible to guess ticket number but not the encrypted text.
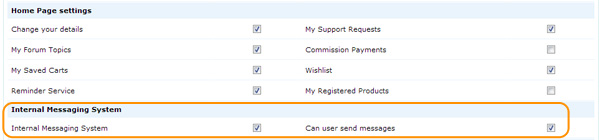
Internal Messaging System
Now users can communicate with each other by leaving internal messages on User Home page.

Settings:
- Go to Settings > Site Users > User Types > Customer > Edit Type and select checkboxes Internal Messaging System and Can user send messages.
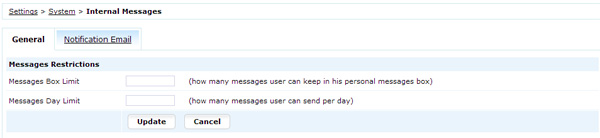
- Specify Messages Box Limit and Messages Day Limit in Settings > System > Internal Messages. Also on this page is available a notification template to inform customers when they receive a new message.
- Login to User Home page and go to My Messages section. There you can write a new message to a fellow user using their Nickname and read incoming messages.
Two-Factor Authentication
Unfortunately stolen passwords is a common thing nowadays - trojans, bot programs or simply entering password on a foreign machine can lead to a broken site and stealing of credit cards. To increase security we created a new way to login in admin panel by entering a verification code. The code is sent either in SMS or an email.
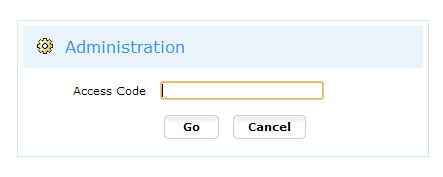
Settings: go to Settings > System > Two-Factor Authentication and select checkbox Use Two-Factor Authentication. Then choose how the verification code should be sent. There are two options: email or SMS. In any case the notification must contain {access_code} tag.
Note: to send SMS messages please set up an SMS gateway. It is done this way:
- select one of the available providers (PolySMS, Clickatell or Googlevoice) in /sms folder of ViArt Shop
- register an account with this SMS provider
- enter account username and password in the script
- rename the script into "sms_functions.php"
- move the script to /includes folder of ViArt Shop
- test SMS sending via CMS block Global > SMS Test
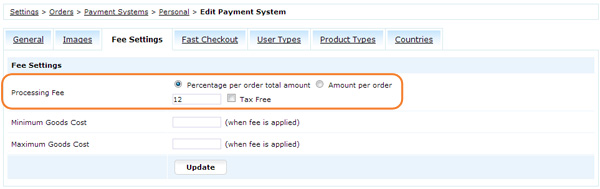
Tax on Payment Fee
Due to some countries law requirements we added a possibility to set tax values for Processing Fee in Payment System settings.
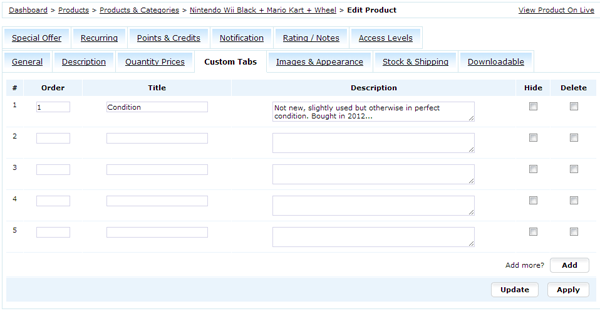
Product Custom Tabs
Sometimes there is a need to add additional information on the product page like shipping details, storage conditions etc. For this information now there is a new functionality Custom Tabs.
Settings:
- In Dashboard > Products > Products & Categories > Product > Edit Product click on Custom Tabs tab and specify data in available fields.
- Pre-defined product tabs can be sorted as well with the help of new page Product Tabs in Settings > Products > Products Settings.

Zip Codes in Shipping Methods
From now on you can configure shipping methods not only according to Order Total, Weight and Country/States but according to Zip codes too. For example, it is possible that in some region of the country shipping cost is bigger than normal and usually this region has specific Zip codes.
Notes
- you can specify Zip codes using comma or semicolon separator
- you can specify not the full Zip code but only starting digits, for example if in Zip Codes text area are the following values: BF1,BF3,BF52 then the shipping method will apply to Zip codes BF10000, BF10001, BF10002 ... BF19999, BF3000, BF30001...BF39999, BF52000, BF52001...BF52999.

Other improvements
Payment systems
- New payment systems were added: Commweb, Payson API, Payson Invoice, Amazon Payment, ECOMM.
Security measures
- added increasing delay before next attempt to login
- patched admin and filter scripts for possible XSS attempts
var_definition.php additions
- Browser language detection is activated by uncommenting the line:
$va_browser_language = true; - Keywords search by partial terms is activated by adding this line:
$va_keyword_like = 1;
Other changes
- More export possiblities were added: Related Products, Quantity Prices and Serial Numbers.
- Twitter Feed was re-written according to new API and has new activation instructions.
ViArt Team.
