18.3. How to add Categories
18.3. How to add Categories


|
Add Category
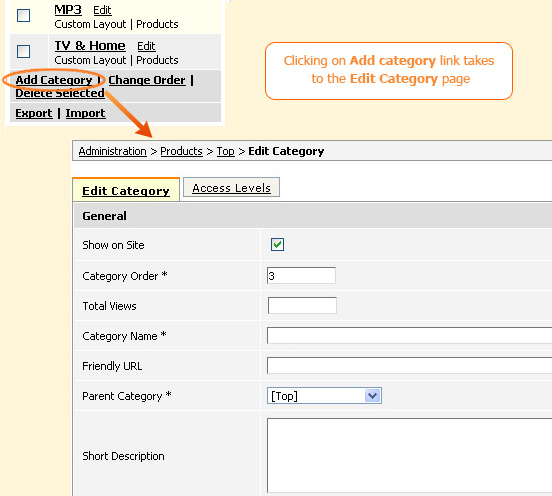
To add a new category go to the Products & Categories page which could be done either by clicking on Products link on the Top Menu or by clicking on Products & Categories link on the welcome screen, and then click on Add Category link from the left hand column as shown in the screenshot.
 If you need to add a subcategory first navigate to its parent category and then within this category click on Add Category link.
Note: You can easily define the category you are in by looking at the Breadcrumbs at the top of the page.
Alternatively you could select the appropriate parent category on the Edit Category page afterwords.
On clicking Add Category link you will see a page with two tabs Edit Category and Access Levels.
Edit Category tab
On Edit Category tab there are the following settings:
Show on Site – Ticking this checkbox shows the category on the website.
Category Order – This determines the position of the category on the website.
There is an easier way of sorting categories which is explained in the [link] section.
Total Views - This field is automatically populated and will display the number of times the category was visited on the website.
Category Name – This is the name of the category. The category name play an important role in search engine optimisation. Good examples of category names are: iphone, LG Televisions, Sony Laptops, etc.
Friendly URL – This is a user friendly URL. By default if freindly URLs are activated in
System > Global settings, the Admin system uses the Category Name as the friendly URL with spaces in the category names replaced by underscores ("_").
Parent Category – This is where you can assign a Parent Category for this
category. Use the "Top" category if you want this category to be a Parent by itself and not a sub-category for any other parent.
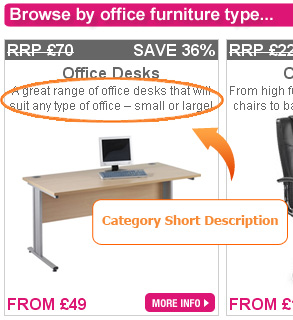
Short Description – This description is shown on the category listing block. Usually this needs to be restricted to a short sentence or strap-line.
The screen-shot below shows how it can be implemented on the site:
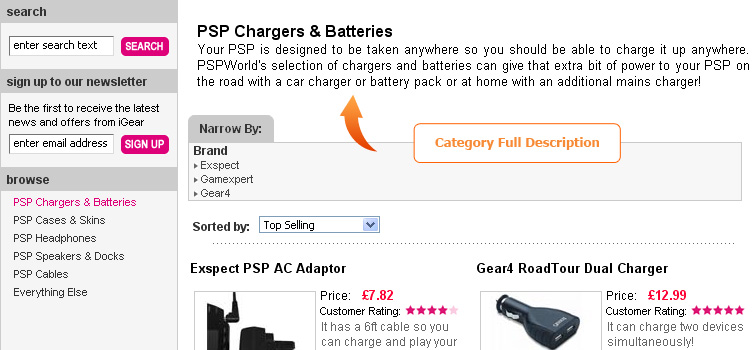
 Full Description – This can be shown as an introductory text on a product category page (note, for this you will need to select Products (Category Info) block in CMS on Product Listing Page). The below screen-shot shows an implementation of this field.
 Subcategories Products – Ticking this checkbox shows all the products that are available in the subcategories of this category.
Allowed Post to Subcategories - This checkbox allows Merchants to post products in this category's subcategories. (Valid up to version 3.5, for later versions this setting is defined in Access Levels).
Google Base Product Type - This field defines the Google Base Type for all products within this category.
List Image – This is a Small image that is mostly used in the category listing blocks or in the Category Info block.
Subcategories Products – Ticking this checkbox shows all the products that are available in the subcategories of this category.
Allowed Post to Subcategories - This checkbox allows Merchants to post products in this category's subcategories. (Valid up to version 3.5, for later versions this setting is defined in Access Levels).
Google Base Product Type - This field defines the Google Base Type for all products within this category.
List Image – This is a Small image that is mostly used in the category listing blocks or in the Category Info block.
Large Image – This image can be shown in the Category Info block, on the top of every product listing page, or in the category listing blocks as well.
After adding an image to the category do not forget to select appropriate Image Type in CMS because by default in category blocks there is used either "No image" option or the "Default image" (e.g. tree_top.gif).
List Image Alt and Large Image Alt - The value entered here will show up as the ALT tag on the image (The image name you get when you move your mouse pointer over an image).
Products List Template - This is where you can insert your own custom template for displaying Products Listing block.
Page Title – This shows on the title bar of your browser.
 Meta Keywords – These words and phrases appear in the Meta Keywords section of the
products listing page. Search engines index pages according to them. Comma separated values need to be entered here.
Meta Keywords – These words and phrases appear in the Meta Keywords section of the
products listing page. Search engines index pages according to them. Comma separated values need to be entered here.
Example: Sony televisions, flat TV, HD Ready, Plasma Screen
Meta Description – This appears in the Meta Description section of the
products listing page
and is taken by search engines to show on search results. Short sentences can be entered here.
Example: We offer a wide range of Sony Flat Panel Televisions.
Access Levels tab
On Access Levels tab you can define who is allowed to view this category and also if it is allowed to post in it (used for merchants module).
Default settings look like this:
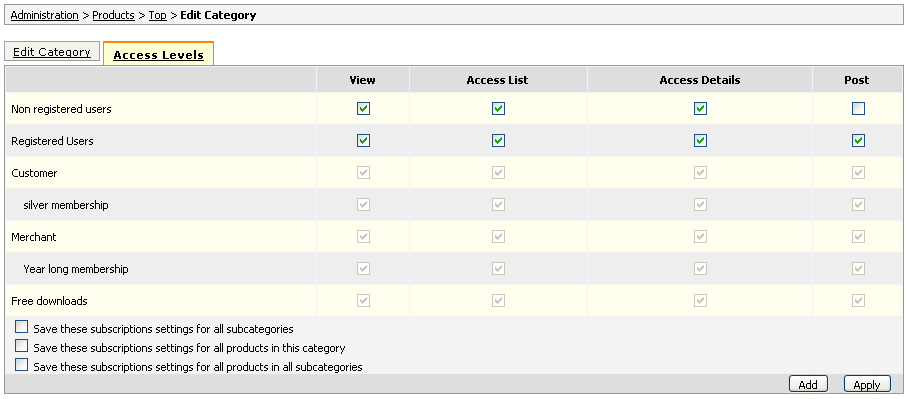 View column defines for which users this category name will be visible in the category listing blocks.
Access List defines which users will be able to visit the product listing page of this category.
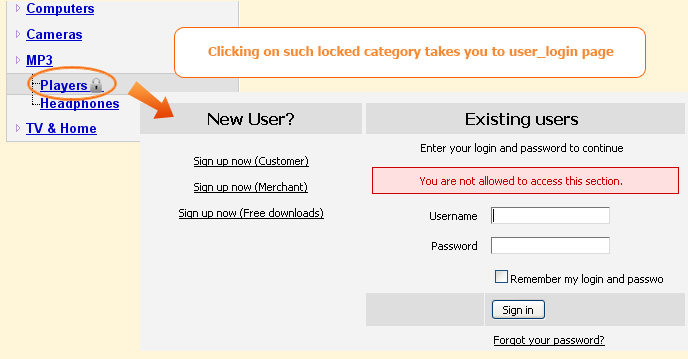
Note: in case the View column will be checked and Access List unchecked then there will appear a lock sign near the category name and when user clicks on such category name he will be transfered to user_login page.
 Access Details this column is used for Products to allow access on the product details page.
- Save these subscriptions settings for all subcategories means that if you check this field and click Update or Apply, these Access Levels settings will spread to all subcategories within this category.
- Save these subscriptions settings for all products in this category means that if you check this field and click Update or Apply, these Access Levels settings will spread to the products but only within this category.
- Save these subscriptions settings for all products in all subcategories means that if you check this field and click Update or Apply, these Access Levels settings will spread both to products within this category and to products in all its subcategories.
|
|
|

