|
|
|
This tutorial covers the following sections: Back to topGeneral SettingsTo configure order-fulfillment procedure, we strongly recommend to set general settings on the Order Profile page. Basic settings are located in the 'General' Tab. Below is an overview of each option. Options within an HTML Settings section Intro Text - Enter an introductory text here. The text will be shown on the order_info.php page. You're welcome to include any information you may find useful for your customers, like delivery cost information, information on payment systems, etc. 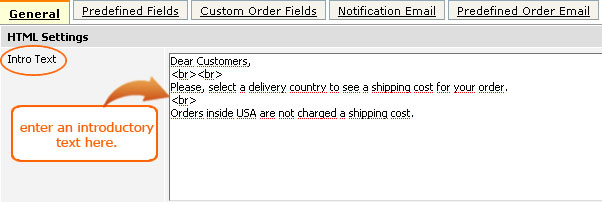 You can use html tags to mark some words or a part of the text. The text will be shown on the order_info.php page:  'Show Subcomponents' option defines a look of product subcomponents (if any) on the order_info.php page. Select 'Each subcomponent shown as a separate product' to display subcomponents as separate items on the checkout.  Select 'Subcomponents shown underneath parent product' option to display subcomponents as additions to a product.  Shipping Control Type controls the display of the delivery options on the checkout. Currently, there are two types: you can either use Radio buttons or a Listbox. If you select Radio buttons the shipping methods will have such a look:  If you decide to use a Listbox display your delivery options will be shown as follows:  Payment System Settings Payment Control Type option defines the way available payment systems will be shown on the order_info.php page. Select a 'Listbox' option to show your payment gateways as a drop down list:  Select 'Radio Buttons' to show available payment systems as radio buttons on the order_info.php page:  Payment System Image option allows to display a payment system logo next to a radio button. Please, select either a small or a large image to show a logo on the order_info.php page. Note: To display an image for a certain payment system do not forget to upload an image via Administration > Payment Systems > Edit Payment System > Images tab, like:  Note: Payment logos are shown with radiobuttons type only. They are not displayed for a Listbox type. Select 'No image' if you do not want to display a payment logo image on the checkout page. Order Restrictions Section Order Restrictions section allows to set general order restrictions under which an order can be placed. Product cost per order is used when you want to prohibit customers to place orders less than some minimum and maximum order amount. For example, if you decide that a minimum amount for an order should be not less than $100 set '100' in the 'Minimum' field and some maximum limit (if any). In this case customers will be able to place oders only with the total sum of $100, otherwise they'll get the following error message:  Weight option is to be used when you wish to restrict order by some minimum and maximum product weight. For example, if you decide that a minimum product weight be not less than 10 lb set '10' in the 'Minimum' field and some maximum limit (if any). In this case customers will be able to place oders only when the order total weight is 10lb or more. Otherwise, they'll get the following error message: Choose Prevent repurchase option to prohibit your customers to purchase the same product once again and enter a certain number of days in the Repurchase Period textbox to define the period within which you're not allowed your customers to purchase the same product. To check how the feature works please visit your site and make two test purchases. The system allows to make only one purchase. For the second purchase you will be presented with the following error message:  Back to top Predefined FieldsPredefined fields are default fields you may wish to show on the order_info.php page or on the Call Centre orders page. Select either 'Show' option (not obligatory) or 'Required' (obligatory) option against each predefined field you want to make active. Should a customer omit any field marked as *(Required) he won't be allowed to proceed to the payment's page until he enters the required information. Otherwise, he'll receive the following error message.
 If you want to add a newsletter subscription block to order_info.php page please enable an option 'Subscribe Block':  Once done please check an order_info.php page - a field for a newsletter subscription will appear:  For more information on newsletter module see section 41 Back to topAdding Custom Order FieldsApart from predefined order fields you may want to use custom order fields to add additional fields(options) on the order_info.php page. To do this navigate to Administration > Orders > Order Profile Page > Custom Order Fields tab. Click on the 'Add New' link to Add a new custom field:  A custom field is very much alike adding an option. Let's add a custom field 'How did you hear about us'. Fill all the required fields as shown below:  Once the information is correctly entered, go to order_info.php page and check a custom field you've just added. It will look as follow:
 Note: A custom field will appear after predefined fields only. Back to topSetting Order NotificationsIf you want to receive a notification once a user passes the first page of the checkout or if you want to notify a user about this you may set Administrator or user email and sms notifications. For more information on setting email and sms notifications see details |
|
|

