18.5.4. Images and Appearance Tab
18.5.4. Images and Appearance Tab


|
Images fields
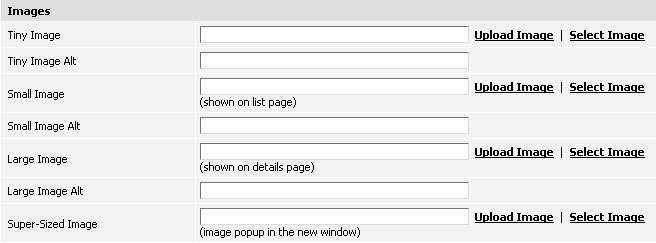 Tiny Image – This is a very small image that can be used on checkout, on basket page
and on invoice.
Small Image – This image will be shown on the product listing page.
Large Image – This image will be shown on the product details page.
Super-Sized Image – This is a very large image that appears in a pop-up window when you click on the Click Here for Larger Image link on product details page.
Tiny Image Alt / Small Image Alt / Large Image Alt – The value entered here will show up as the ALT tag on the image (the image name you get when you move your mouse pointer over an image).
You can use the Upload Image or Select Image links to upload pictures from your PC.
Tiny Image – This is a very small image that can be used on checkout, on basket page
and on invoice.
Small Image – This image will be shown on the product listing page.
Large Image – This image will be shown on the product details page.
Super-Sized Image – This is a very large image that appears in a pop-up window when you click on the Click Here for Larger Image link on product details page.
Tiny Image Alt / Small Image Alt / Large Image Alt – The value entered here will show up as the ALT tag on the image (the image name you get when you move your mouse pointer over an image).
You can use the Upload Image or Select Image links to upload pictures from your PC.
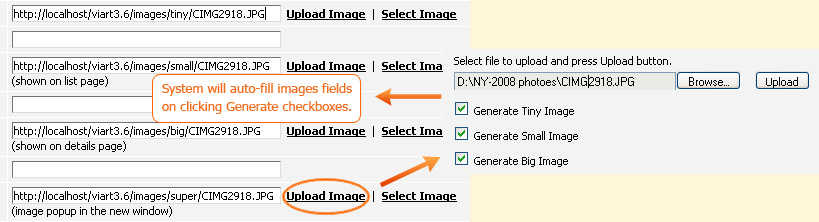
Upload Image
Upload Image - This link brings up a pop-up window which will allow you
to browse to the images folder stored on your PC and select the required image
to upload it to the website. In order to be able to upload images
there should be writable permissions on your shop's "images" folder along
with its subfolders (tiny/small/big/super).
Note: if your hosting server has GD library then it is possible to
resize images generating smaller images from a larger one (but not vice versa).
For example, uploading Super-Sized image to the product you can select to
generate Big, Small and Tiny images. Then system will create appropriate images
and save them in corresponding folders and also auto-fill these images fields
on the tab.
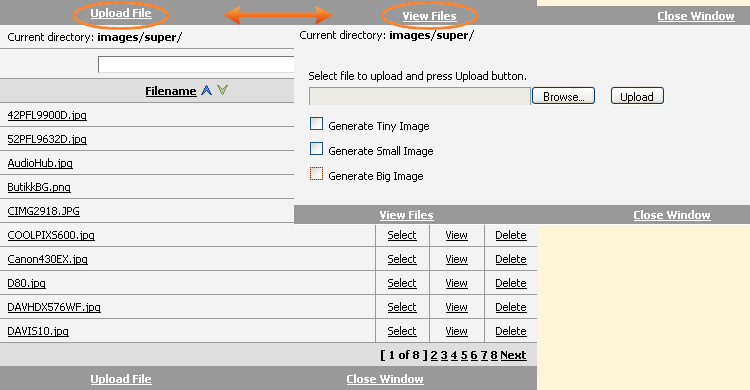
Select Image
Select Image - This link brings up a pop-up window of already available images on your website. By default the directory will be images/[tiny/small/big/super]
- the subfolder depends on what image you are uploading. You can select any picture from the list. You can also search for the image by its name using the search block on the top of the page. Near every image there are available three options: Select, View and Delete.
- Select - On clicking it system will insert this image path in the image field.
- View - By default on clicking this link system will open this image in a new window.
Note: you can change this setting and make the system to show preview image
by hovering your mouse pointer over the Image Name field by ticking the checkbox Show image thumbnails on Select Image screen for administrators in System > Global settings.

- Delete - Clicking this option will delete the image from the database.
You can switch back and forth between Upload Image and Select Image options in the same pop-up window by clicking View Files or Upload File links.
Appearance section
 Custom Template – You can create your own custom template for a particular
product. This template can change display of the Product Details Page block. It should be in HTML format and the path should be entered like this: /templates/user/custom.html
Hide 'Add to Cart' button - By ticking one of the options available here, the Add to Cart button can be hidden either on product listing page or
on product details page.
Custom Template – You can create your own custom template for a particular
product. This template can change display of the Product Details Page block. It should be in HTML format and the path should be entered like this: /templates/user/custom.html
Hide 'Add to Cart' button - By ticking one of the options available here, the Add to Cart button can be hidden either on product listing page or
on product details page.
Note: the checkbox on table view list hides Add to Cart button on product listing page when there is selected Default View Type: Table view for "Product Listing Page" block in CMS > CMS Settings > Product Listing Page. As for on grid view list - such product listing option is not yet implemented but it will be in the nearest future.
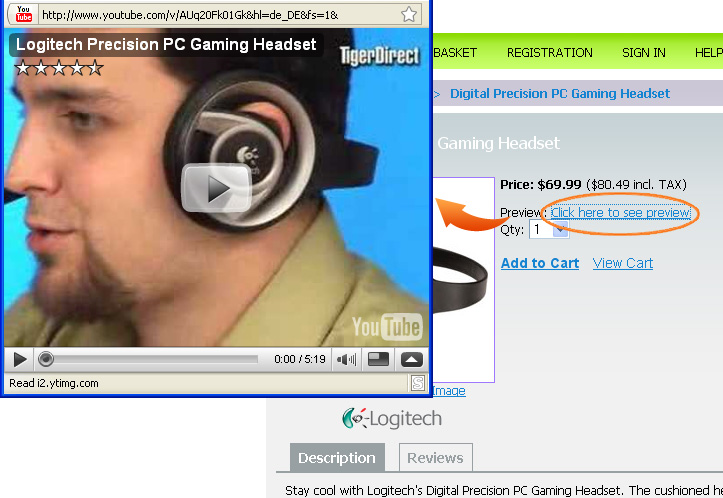
Product Preview URL - This option can be used for some additional
information about the product. For example, it could be a link to some
video tutorial or another HTML page. Clicking it will open a new pop-up window,
the sizes of which can be regulated with the Width and Height parameters.
|
|
|

